Search Classes and Add to Schedule
Follow the steps to search and add classes to your schedule
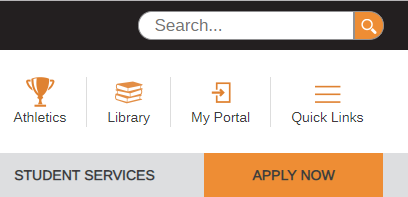
Step 1: Go to www.reedleycollege.edu and click MyPortal
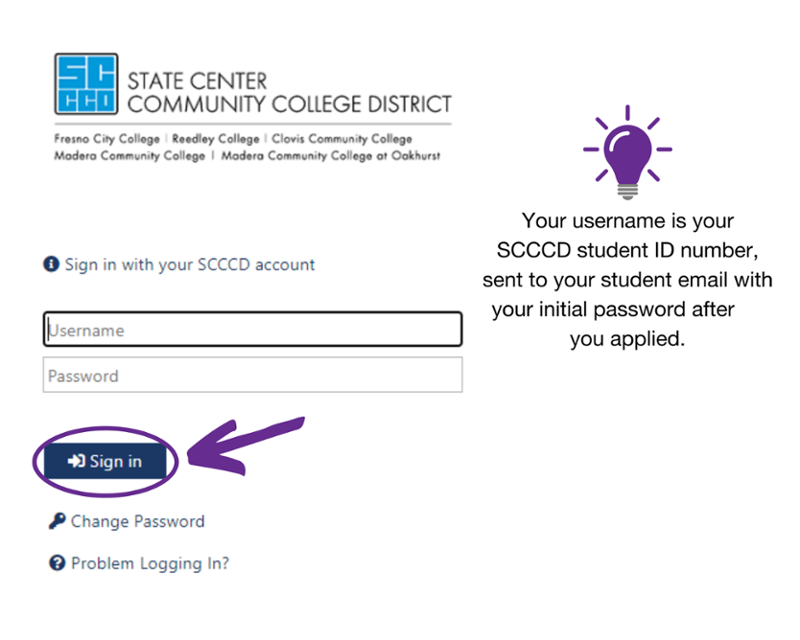
Step 2: Sign in to My Portal
If you need assistance logging in, visit our Technology Help page or call the SCCCD Helpdesk at (866) 245-3276.
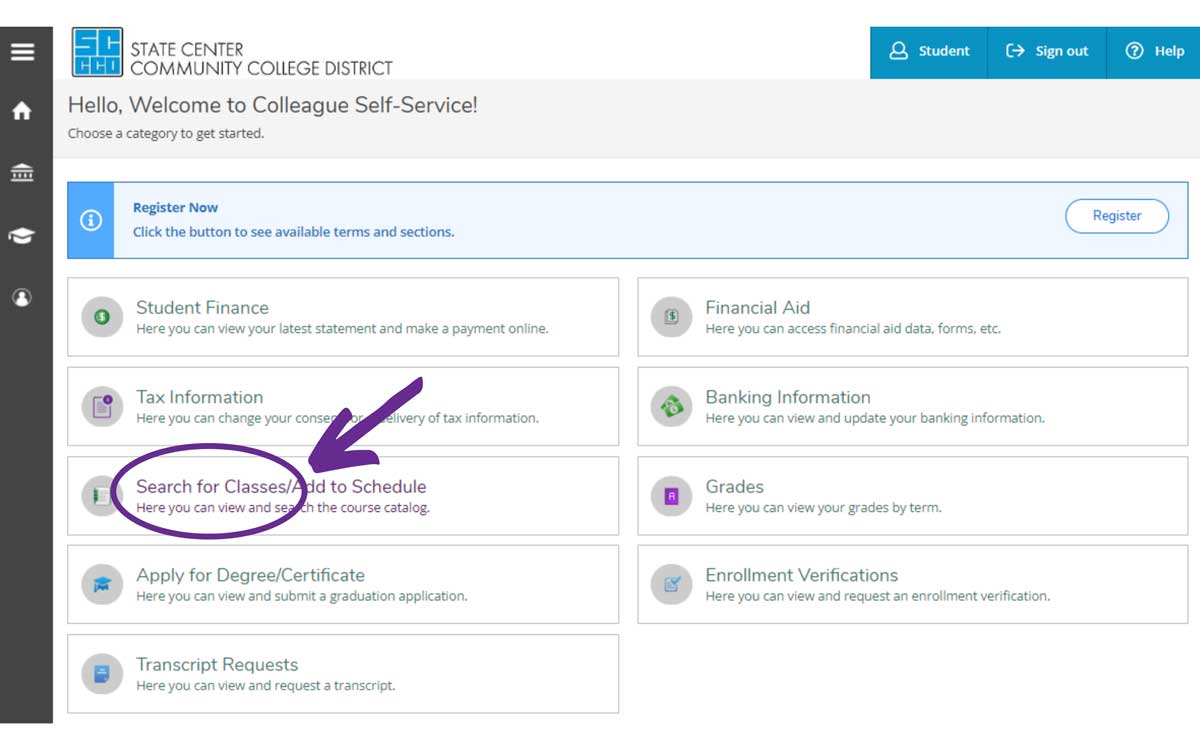
Step 3: Select the Self-Service app

Step 4: Select Search for Classes/Add to Schedule
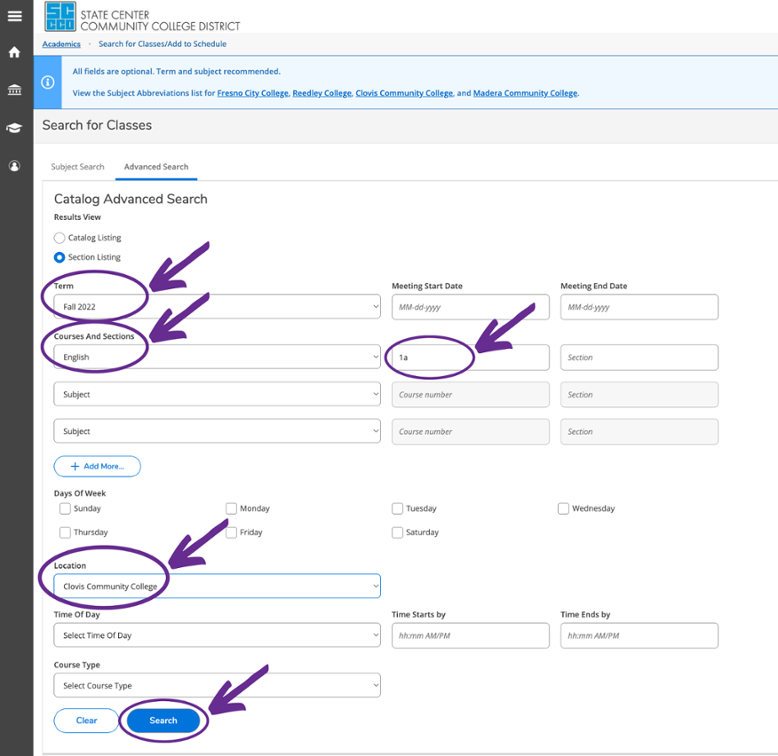
Step 5: Search for classes by selecting the Term, Subject, and Location.
Search for classes by selecting the Term, Subject, and Location. Click ‘Search’. (You may enter more fields such as Course Number, Section, Days of Week, Time of Day, and Course Type to narrow your search.)
If you are interested in an online or hybrid class, you will need to search separately for those options.
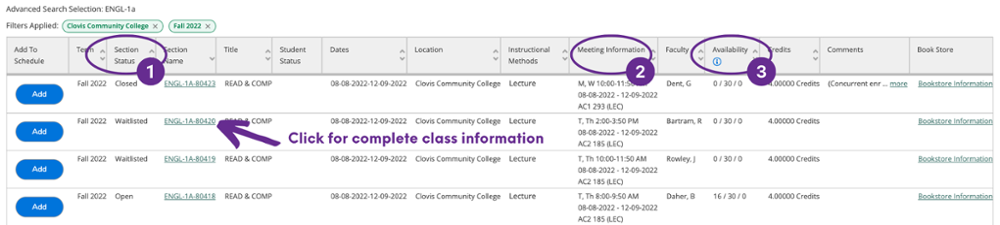
Step 6: Review the different course offerings.
- Section Status to see if a class is open, closed, or waitlisted:
- Open: Class is available to register
- Closed: Class is full but the waitlist hasn't started. If you select waitlist, you will be the first student on the waitlist.
- Waitlist: The class waitlist has started.
- Meeting information for class meeting dates/times
- Availability:
- Available: Number of spots available
- Capacity: Number of students allowed
- Waitlist: Number of students on the waitlist
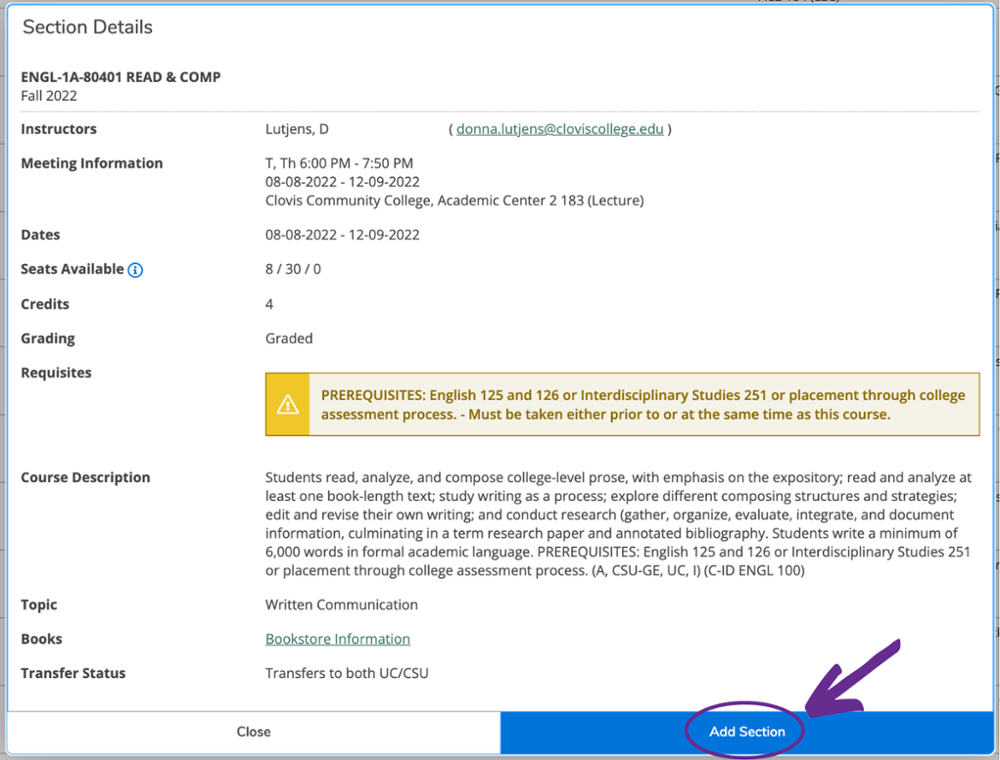
Tip: Click on the Section Name to review the complete class information including lab times, required materials, etc.
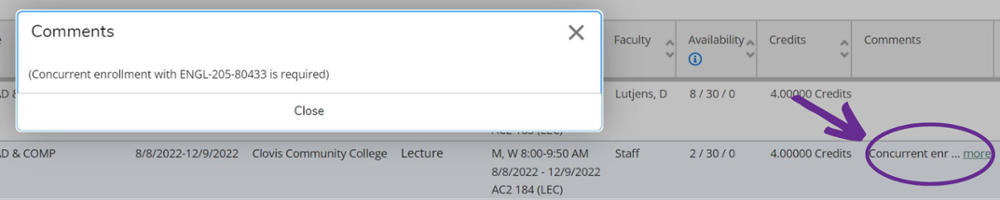
Note: If you have a corequisite class, select the ‘more’ button on the Comments section to see which corequisite course is assigned. The corequisite class will be automatically added to your schedule, make sure to register for both courses. (If you do not need the corequisite, you do not need to register for a section that requires the corequisite.)
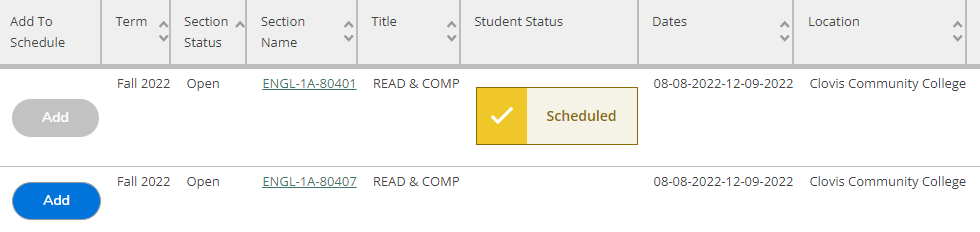
Step 7: Click Add to select a course. Review the Section Details pop-up and select 'Add Section'
Step 8: Under the Student Status column, the class will be shown as scheduled. To move the class from scheduled to registered, follow the Registration Instructions.